Are you someone with mature skin who wants to enhance their natural beauty? If so, you’ve come to the right place! This article will provide you with some helpful makeup tips specifically tailored for mature skin. Whether you’re looking for techniques to minimize fine lines and wrinkles or recommendations for the best products to use, we’ve got you covered. Get ready to embrace your age gracefully and feel confident in your own skin with these fantastic makeup tips!

This image is property of images.unsplash.com.
Choosing the Right Foundation
Consider Your Skin Type
When it comes to choosing the right foundation, it’s important to consider your skin type. Mature skin tends to be drier and may have more fine lines and wrinkles, so it’s essential to choose a foundation that provides hydration and doesn’t settle into those lines. Look for foundations that are labeled “moisturizing” or “hydrating” as they will provide the necessary moisture for your skin.
Opt for a Lightweight Formula
As we age, our skin tends to lose elasticity, and heavy foundations can emphasize this. Instead, opt for a lightweight formula that provides coverage without feeling heavy or cakey. These foundations are often labeled as “sheer” or “lightweight,” and they will give your skin a natural, youthful glow.
Find the Right Shade
Finding the right shade of foundation is crucial for a flawless finish. As we age, our skin can become more uneven in tone, so it’s important to choose a shade that matches your skin tone exactly. Avoid foundations that are too light or too dark, as they will make your skin appear unnatural and can age you. Take the time to swatch different shades on your jawline and choose the one that disappears into your skin seamlessly.
Test the Foundation
Before committing to a foundation, it’s essential to test it out to ensure it meets your needs. Apply a small amount of the foundation to your jawline and blend it in. Check the color in natural light to see if it matches your skin tone. Additionally, wear the foundation for a few hours to see how it wears throughout the day. Does it oxidize or separate? Does it feel comfortable on your skin? These are all factors to consider before purchasing a foundation.
Prepping the Skin
Cleanse and Moisturize
Before applying any makeup, it’s crucial to start with a clean canvas. Cleanse your skin with a gentle cleanser suitable for your skin type to remove any dirt or oil. Follow up with a moisturizer that is specifically formulated for mature skin. This will not only hydrate your skin but also create a smooth base for your foundation.
Apply a Primer
Using a primer before foundation can help to extend the wear of your makeup and create a smooth surface for application. Look for a primer that is hydrating and blurring to help minimize the appearance of fine lines and pores. Apply a small amount of primer all over your face, focusing on areas where makeup tends to wear off quickly.
Use a Color Corrector
If you have any specific skin concerns such as redness or dark spots, consider using a color corrector before applying foundation. Green color correctors can help neutralize redness, while peach or orange color correctors can help counteract dark spots. Apply a small amount of color corrector to the problem areas and blend it in gently before applying foundation.
Apply Sunscreen
Protecting your skin from the sun’s harmful rays is essential at any age, but especially for mature skin. Look for a lightweight, broad-spectrum sunscreen with at least SPF 30 and apply it as the final step before applying your foundation. Sunscreen not only helps protect your skin from premature aging but also helps prevent sunspots and skin damage.

This image is property of images.unsplash.com.
Creating a Flawless Base
Use a Light-Reflecting Concealer
To hide any imperfections or dark circles, use a light-reflecting concealer. These concealers not only provide coverage but also help brighten your under-eye area and give your skin a radiant finish. Choose a shade that is one or two shades lighter than your foundation and apply it in a triangle shape under your eyes. Blend it in gently using your fingers or a damp makeup sponge.
Apply Foundation with a Damp Sponge
To achieve a natural, flawless finish, apply your foundation with a damp makeup sponge. This will help to sheer out the foundation and give your skin a hydrated, dewy look. Start by applying small dots of foundation to your face, focusing on areas that need the most coverage. Then, using the damp sponge, blend the foundation into your skin using gentle tapping motions.
Blend Well
Blending is key to achieving a seamless, natural-looking base. Make sure to blend your foundation down your neck to avoid harsh lines and ensure a smooth transition. Use a gentle tapping motion or swirling motion with your sponge or brush to blend the foundation into your skin. Take extra care around the hairline and jawline to avoid any visible makeup lines.
Set with a Finishing Powder
To ensure your foundation stays in place throughout the day and to minimize shine, set it with a finishing powder. Opt for a lightweight powder that is translucent or matches your skin tone. Using a fluffy brush, lightly dust the powder all over your face, focusing on areas that tend to get oily. This will help to set your foundation and give your skin a matte finish.
Enhancing the Eyes
Prime the Eyelids
Before applying eyeshadow, it’s essential to prime your eyelids to ensure that the color stays vibrant and crease-free. Use an eyeshadow primer or a light layer of concealer on your eyelids and blend it in. This will create a smooth canvas and help the eyeshadow adhere better.
Choose Neutral Eye Shadows
When it comes to mature skin, opting for neutral eyeshadows is the way to go. Neutral shades such as taupes, browns, and beiges are flattering on all skin tones and can help create a soft, natural look. Avoid using overly shimmery or glittery eyeshadows, as they can emphasize fine lines and wrinkles.
Avoid Heavy Eyeliners
Instead of using heavy eyeliner, opt for softer alternatives such as a brown or gray eyeshadow applied close to the lash line. This will define your eyes without looking too harsh. If you prefer a more defined look, use a soft eyeliner pencil and smudge it out for a softer effect.
Curl Lashes and Apply Mascara
Curling your lashes can instantly open up your eyes and make them appear more youthful. Invest in a good eyelash curler and gently curl your lashes before applying mascara. Look for a mascara that provides length and volume without clumping. Apply it from the roots to the tips of your lashes, wiggling the wand to ensure even application.

This image is property of images.unsplash.com.
Defining the Brows
Fill in Sparse Brows
As we age, our eyebrows can become thinner and sparser. To define your brows and create a more youthful appearance, fill them in with an eyebrow pencil or powder. Choose a shade that matches your natural hair color and fill in any sparse areas using short, light strokes. Take care to create natural-looking brows and avoid harsh lines.
Choose a Shade that Matches
When choosing an eyebrow product, it’s essential to select a shade that matches your natural hair color. If you have lighter hair, opt for a blonde or light brown shade. If you have darker hair, choose a medium brown or dark brown shade. Avoid using black eyebrow products, as they can appear harsh and unnatural.
Use a Brow Gel
To set your brows in place and create a polished look, use a clear or tinted brow gel. Brush the gel through your brows in the direction of hair growth to keep them in shape and add definition. The gel will also help to fill in any gaps and give your brows a fuller appearance.
Brush and Blend
After filling in your brows and applying brow gel, take a spoolie brush or a clean mascara wand and brush through your brows to blend the product and make them look more natural. This step will help to distribute the product evenly and soften any harsh lines.
Adding a Healthy Flush
Opt for Cream Blush
Cream blushes are perfect for mature skin as they provide a natural, dewy finish and blend seamlessly into the skin. Look for cream blushes in warm, rosy tones that mimic a natural flush. Apply a small amount of cream blush to the apples of your cheeks and blend it out using your fingers or a makeup sponge.
Choose Warm, Rosy Tones
When selecting a blush shade, opt for warm, rosy tones that complement your skin tone. These shades will give you a healthy, youthful-looking flush. Avoid using overly cool or bright shades, as they can appear unnatural and harsh.
Apply Blush to the Apples of the Cheeks
To achieve a natural, youthful flush, apply blush to the apples of your cheeks. Smile to locate the apples, and using gentle tapping motions, apply the blush in a circular or upward motion. Focus the majority of the blush on the apples of your cheeks and blend it out towards your hairline.
Blend Well
Blending is key to achieving a natural-looking blush. After applying the blush, take a clean makeup sponge or a fluffy brush and blend it out gently. This will help to soften any harsh edges and create a seamless transition.
Highlighting Facial Features
Apply Highlighter to the High Points
Highlighter can add a youthful glow and bring dimension to the face. Apply highlighter to the high points of your face, including the cheekbones, brow bone, down the bridge of your nose, and on the cupid’s bow. Use a small, fluffy brush or your fingertips to apply the highlighter and blend it in gently.
Avoid Glittery Formulas
When choosing a highlighter, opt for formulas that provide a subtle glow rather than those with chunky glitter particles. Glittery formulas can emphasize texture and fine lines, so it’s best to stick to more natural-looking highlighters. Choose shades that complement your skin tone, such as champagne or rose gold.
Choose a Subtle Shade
For a natural look, choose a highlighter shade that is slightly lighter than your skin tone. This will give your skin a subtle, healthy glow without looking too obvious. Apply the highlighter sparingly, focusing on the areas where light naturally hits your face.
Blend for a Natural Look
After applying highlighter, take a clean makeup sponge or a fluffy brush and blend it in gently to create a seamless, natural look. This step will help to smooth out any harsh lines and ensure that the highlighter melts into your skin.
Avoiding Heavy Contouring
Opt for a Soft Contour
While contouring can help sculpt and define your facial features, heavy contouring can look harsh and aging on mature skin. Instead, opt for a soft contour using a matte bronzer or a contour powder that is only slightly darker than your natural skin tone. Focus on enhancing your natural features rather than drastically changing your face shape.
Blend Well
Blending is key when it comes to contouring. After applying the contour product, take a clean makeup sponge or a fluffy brush and blend it in gently. This will help to create a seamless, natural look and prevent any harsh lines.
Avoid Harsh Lines
To create a natural-looking contour, avoid creating harsh lines on your face. Instead, use small, circular motions to blend the product into your skin. Take care to blend the contour product into your hairline, jawline, and along the sides of your nose for a more defined look.
Focus on Accentuating Features
Rather than heavily contouring your entire face, focus on accentuating your best features. For example, lightly contouring the hollows of your cheeks can help enhance your cheekbones, or contouring along your jawline can create a more defined shape. The key is to keep it subtle and natural-looking.
Choosing the Right Lip Color
Opt for Creamy Formulas
As we age, our lips can become drier and lose some of their natural fullness. Opt for creamy formulas when choosing lip products, as they will provide hydration and help to plump the lips without emphasizing any texture. Avoid matte finishes, as they can be drying and make your lips appear thinner.
Avoid Matte Finishes
While matte lipsticks have been popular in recent years, they can be less forgiving on mature lips. Matte formulas tend to emphasize fine lines and can make your lips appear drier. Instead, opt for satin or creamy finishes that provide moisture and a more youthful-looking appearance.
Choose Nude or Rosy Shades
When it comes to lip colors, nude or rosy shades are universally flattering and can give your lips a natural, youthful look. Choose shades that are one or two shades darker than your natural lip color to add depth and definition. If you prefer a bolder look, opt for brighter shades of pink or coral.
Use Lip Liner for Definition
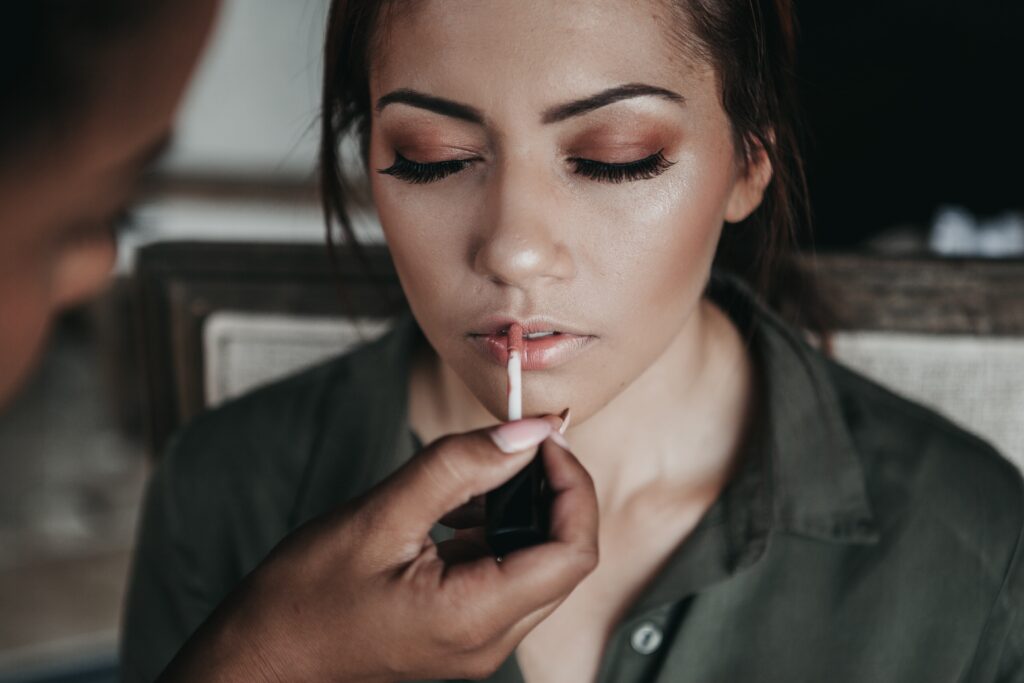
To prevent your lipstick from bleeding or feathering into fine lines, use a lip liner to outline and define your lips. Choose a lip liner that matches your natural lip color or the shade of lipstick you will be wearing. Trace along the natural shape of your lips, focusing on the cupid’s bow and the corners of your mouth, and then fill in the rest of your lips with the liner for long-lasting color.
Setting Makeup for Longevity
Use a Makeup Setting Spray
To ensure your makeup stays in place throughout the day, finish off your routine with a makeup setting spray. Setting sprays help to lock in your makeup and prevent it from smudging or fading. Choose a setting spray that is suitable for your skin type and spray it evenly over your face, keeping your eyes closed.
Avoid Powdering Too Much
While setting powder can help to control shine, too much powder can emphasize fine lines and wrinkles. After applying your foundation and concealer, use a light hand when applying powder and focus on areas that tend to get oily, such as the T-zone. This will help to set your makeup without making your skin look dry or cakey.
Blot Excess Oil
If you notice excess oil on your skin throughout the day, avoid adding more powder, as it can make your makeup look heavy. Instead, use blotting papers or a clean tissue to gently blot away excess oil. This will help to control shine without disturbing your makeup.
Touch Up During the Day
Even with the best setting products, makeup can fade or wear off throughout the day. To keep your makeup looking fresh, carry a small makeup bag with essential touch-up products such as pressed powder, a concealer, and your chosen lip color. Use these products to touch up any areas that need a little extra attention, such as under the eyes or on the lips.
By following these makeup tips for mature skin, you can enhance your natural beauty and achieve a flawless and radiant look. Remember, makeup should enhance your features and make you feel confident and beautiful at any age. Experiment with different products and techniques to find what works best for you, and most importantly, have fun with your makeup routine!
